A rubber tire valve stem on a passenger car rarely fails. The same stem on a 65 psi RV or trailer tire marks the finish, flexes under load, and snaps at the worst possible time — often taking a $100–$300 TPMS sensor with it. After watching two rubber stems wear against the rim flange and one TPMS sensor get chewed up by contact, the upgrade path is clear: switch to tire valve stems made of metal. At Fortune Autoparts, a tire valve manufacturer and wholesale supplier to B2B distributors across multiple regions, we have helped hundreds of RV, light-truck, and trailer owners spec the right metal tire valves for their wheels. This guide covers why the upgrade matters, how metal and rubber tire valve stems compare, and the full step-by-step installation procedure — including the washer-sourcing mistake that costs most first-time installers an extra trip to the parts store.
Why Rubber Tire Valve Stems Fail on Heavy-Duty Wheels
The Three Failure Modes — Flexibility, Rim Marking, Breakage
Three mechanical symptoms signal that a rubber tire valve has reached the end of its service life. Flexibility — under sustained highway speed and 60+ psi inflation, the rubber stem whips slightly with every wheel rotation. On a passenger car at 32–35 psi, this deflection is too small to see. On an RV at 65 psi, it is visible to the naked eye and grows worse with age. Rim marking — as the stem whips, the TPMS sensor body bolted to the inside end scrapes against the rim flange, eventually wearing through the powder coat and leaving bright metal scratches. Breakage — at the end of the wear cycle, the stem either cracks at the rim seat (slow leak) or snaps off entirely (catastrophic pressure loss with sensor flying out of the rim hole).
The Hidden Cost of a Lost TPMS Sensor
A snapped valve stem rarely loses only the stem. The TPMS sensor body is bolted to the inner end of the stem and travels with it when the stem fails. A new OEM TPMS sensor retails at $80–$300 per wheel depending on vehicle make, plus $30–$50 in programming labor at a tire shop. Total cost of a single stem failure on a four-wheel RV: $400–$1,400 when sensors are replaced in pairs. Switching to a metal stem costs $5–$15 per wheel — the upgrade pays for itself the first time a rubber stem fails.
When Rubber Tire Valve Stems Reach End of Service Life
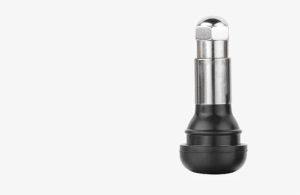
A typical rubber stem on a passenger car lasts 5–7 years. On RV, trailer, and light-truck applications running higher pressures and heavier loads, the service life drops to 3–5 years, and visible rim contact may begin in as little as 18–24 months. Two inspection cues mark the end of useful service — flexibility that is visible without touching the stem, and any sign of powder-coat wear on the rim flange near the sensor body. Once either cue appears, replacement is the only durable option.
Metal vs Rubber Tire Valve Stems
Strength and Pressure Rating
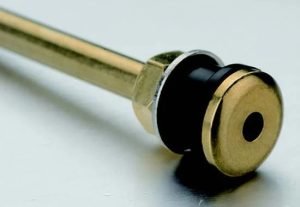
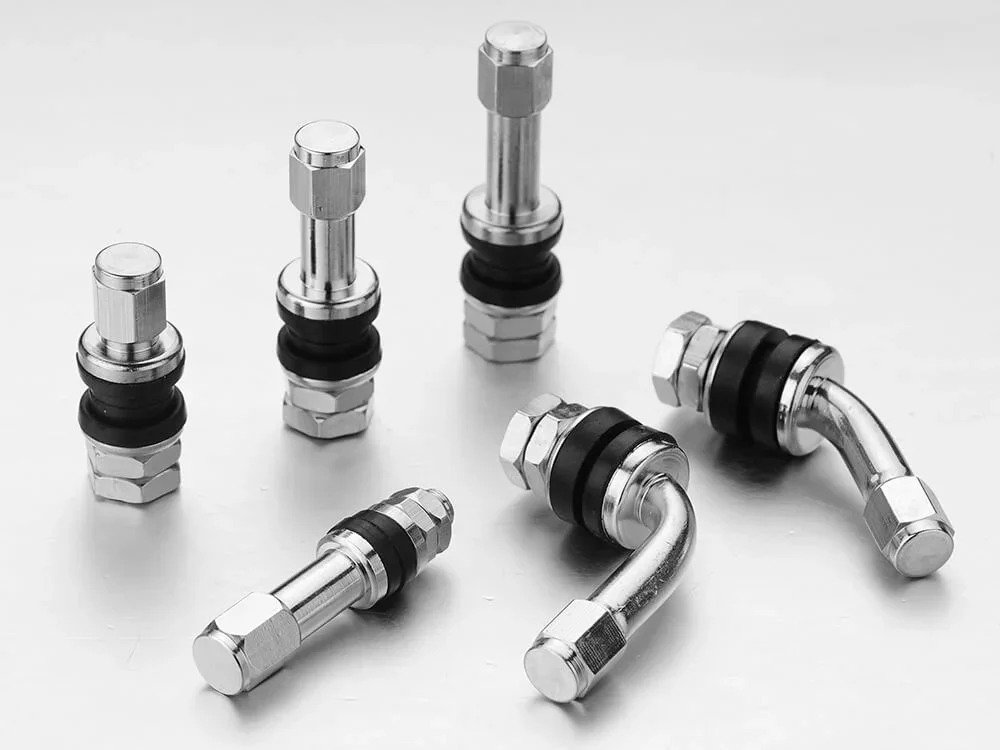
Brass and aluminum tire valve stems are rated for sustained pressures of 100–200 psi depending on model — 2–3× the operating pressure of any consumer RV or trailer tire. Rubber snap-in stems are rated for 65 psi max. For tires inflated to 60–80 psi, both materials are within working pressure, but the metal stem holds its shape over time while the rubber stem creeps and flexes. The pressure-rating margin alone is not the deciding factor; the structural stability across thousands of thermal cycles is what separates the two.
Compatibility with TPMS Sensors
Metal stems accept the same clamp-in or bolt-on TPMS sensor bodies that rubber stems do. The sensor body bolts to a threaded section at the inner end of the stem, identical between rubber and metal designs. The one practical difference: metal stems do not absorb vibration, so the sensor body transmits slightly more high-frequency road noise into the wheel well. This is generally below the audible threshold but is occasionally reported as a faint hum on long highway runs.
Price, Lifespan, and Application Fit
A rubber snap-in stem retails for $2–$5 and lasts 5–7 years on a passenger car. A metal brass or aluminum stem retails for $5–$15 and lasts 10–15 years across the same use cycle. On RV, trailer, and heavy-duty applications, the metal stem is the better fit even at3× the unit price because it eliminates rim marking and removes the failure mode that drives TPMS sensor loss. For passenger cars running OEM pressures, rubber tire valve stems remain the cost-effective default.
How to Install a Metal Tire Valve Stem
Steps 1–2 — Wheel Off, Tire Deflated, Bead Broken
Loosen the wheel lugs on the camper or trailer, then drop the wheel to the ground. With the wheel off, use a valve core removal tool to unscrew the valve core and let the tire deflate — the core is reusable, so set it aside in a clean cup. To access the valve stem from the inside of the rim, only the top bead of the tire needs to be broken — the bottom bead stays seated so the wheel does not lose balance. Lower the trailer stabilizer jack onto the sidewall close to (but not touching) the rim flange to push the top bead down into the well; a few taps with a rubber mallet work the bead into the drop center.
Step 3 — Cut Out the Old Rubber Tire Valve Stem
With the top bead in the drop center, wedge a few short pieces of wood between the bead and the rim to hold the tire away from the rim flange — the wood also catches small washers and nuts if they drop during the swap. The rim hole is typically too small to pull the rubber stem straight out without damaging the rim edge, so cut the stem at the rim seat using a sharp utility knife. Pull the cut section outward and remove the inner portion through the rim hole. Discard the old stem and the rubber sealing washer; these are not reusable.
Step 4 — Choose the Right Metal Stem, Washer, and Nut
Not every metal stem fits every rim hole. The first stem purchased in this install had a sealing washer and lock nut that were too large for the rim flange — the stem sat in the hole correctly, but the nut would not seat flush, and no amount of torque sealed the gap. The replacement stem used a smaller diameter lock nut and a thinner sealing washer that matched the rim flange thickness exactly. Measure the rim flange thickness and rim hole diameter before ordering; the stem vendor needs both numbers to specify the correct washer and nut stack.
Step 5 — Seat, Tighten, and Reinstall the Tire
Feed the new metal stem up through the rim hole from the outside, with the sealing washer already on the stem. Hold the inside of the stem with a rag to keep it from falling into the tire cavity. Place the lock nut on the inner side of the rim and tighten with a ratchet — snug, not crushed. Overtightening distorts the metal stem flange and can crack the sealing washer, both of which produce slow leaks. Once the stem is seated, reseat the tire bead against the rim flange using soapy water as a lubricant — the soap reduces friction and helps the rubber bead pop into final position.
Step 6 — Inflate and Leak-Test with Soapy Water
With the valve core still removed, attach the inflator and bring the tire up to bead-seat pressure (typically 30–40 psi on RV and trailer tires). The top bead pops into place with an audible snap. Reinstall the valve core, then inflate to the operating pressure — for RV tires rated at 65 psi, 60–62 psi is the standard operating range. Spray soapy water around the valve base, the rim flange near the valve, and the tire bead. No bubbles at any of these points confirms a clean install. Any bubble stream indicates a leak that must be fixed before the wheel goes back on the vehicle.
Three Mistakes When Upgrading to Metal Tire Valve Stems
Buying the Wrong Washer or Nut Size
The most common first-time mistake. For each stem diameter, there are usually 5–10 washer/nut combinations available, and rim flange thickness determines which combination seals. Bring the original stem (or precise caliper measurements of rim flange thickness and rim hole diameter) to the parts counter, and confirm the washer and nut stack before leaving. A $5 wrong washer turns a 30-minute job into a 90-minute one.
Over-Tightening the Collar Nut
Metal stems are stronger than rubber, but the sealing washer is still rubber. Tightening the collar nut until the stem “feels solid” usually means the washer has compressed past its elastic limit and is starting to crack. A torque of2–4 Nm is enough — the washer seals under light compression, not under brute force. Snug is correct; “crushed” is a leak waiting to happen.
Skipping the Soapy Water Leak Test
Inflation pressure alone does not confirm a good seal — a slow leak at the rim interface may not show as a pressure drop for several hours. The 30-second soapy water spray test at the valve base and around the rim flange is the only reliable confirmation available without a pressure-decay tester. Skipping it is how you find out about a problem at 100 km.
FAQ
When Should I Switch from Rubber to Metal Tire Valve Stems?
Three application types benefit immediately: any tire inflated above 50 psi (RV, light truck, trailer), any wheel with a TPMS sensor that has shown visible rim contact, and any vehicle that sees sustained highway speed at high ambient temperatures. For standard passenger cars at 32–35 psi with no TPMS contact, rubber stems remain adequate and cost-effective.
Are Metal Tire Valve Stems TPMS-Compatible?
Yes. Clamp-in and bolt-on TPMS sensors mount to the inner end of the stem via a standard M5 or M6 thread that is identical between rubber and metal stems. The sensor body adds20–40 g of mass to the inner end of the stem, which is well within the structural margin of any brass or aluminum stem on the market. Fortune autoparts supplies TPMS-compatible metal tire valve stems in both clamp-in and bolt-on variants for distributors serving the RV and trailer market.
How Long Do Metal Tire Valve Stems Last?
Brass stems last 10–15 years under normal use; aluminum stems last 8–12 years. Both materials outlast rubber by 2–3× the service life. The most common end-of-life cause is corrosion at the sealing washer — annual cleaning of the washer and light re-torque of the collar every 30,000–50,000 km extends service life to the upper end of the range.