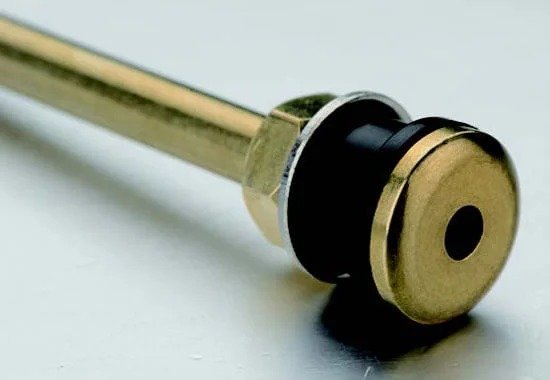
Most drivers who see the tire pressure monitoring system (TPMS) warning light illuminate head straight for a service appointment. However, they may discover that many repair shops equate “TPMS sensor replacement” with removing the entire tire and running it through a tire machine, pushing a single job past thirty minutes. Choosing compatible TPMS valves and using an appropriate replacement method can help technicians streamline certain service procedures.
A shorter path has always existed. One technician uses a method that does not call for fully unseating the bead, compressing the TPMS sensor swap to roughly ten minutes. This article breaks down that underestimated bay workflow — its six phases, five key movements, and the small process details that are easy to miss.
Market Context: Scale and Structure of the TPMS Aftermarket
The aftermarket volume driven by TPMS mandates continues to expand. Growth in passenger vehicle parc and rising average vehicle age have made TPMS sensor replacement a stable service line for shops.
The harder constraint sits inside the sensor itself: the integrated battery typically lasts five to ten years. That means the same wave of TPMS-equipped vehicles will cluster into a “replacement window” over the coming years, and no general repair shop or tire specialist can route around the work.
On the parts side, shops now face three supply categories: OE-equivalent parts (identical to factory spec), branded aftermarket parts (third-party manufacturers meeting the same spec), and programmable universal sensors (blank units that can be activated and programmed to the vehicle frequency via a tool). Each has its own positioning — OE-equivalents offer the most stable fit at higher cost, while branded aftermarket and programmable universal parts deliver better margins in volume scenarios.
Process Breakdown: Six Phases of TPMS Sensor Replacement & Bay Timing
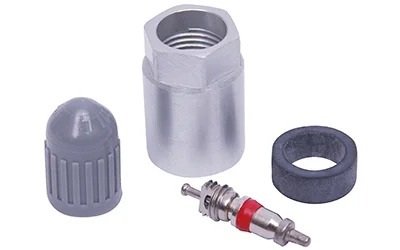
The full workflow breaks into six phases, each with its own time-control checkpoints.
Phase 1 · Deflation & Bead Break
The first step is to remove the valve core and let the tire deflate fully. The wheel is then moved into the lifting position, where a jack paired with a trailer hitch (or a dedicated bead press) compresses the rim edge to unseat one side of the bead from the rim. Two safety details that cannot be skipped: the jack base must stay clear of the rim to avoid damaging it, and counterweight should be placed on the rear of the tire to prevent it from lifting with the jack. Once one side is unseated, the wheel is rotated and the opposite side is broken.
Phase 2 · Create Working Clearance
With the bead unseated, the TPMS sensor is still tucked behind the rim. To expose it, the tire has to be pried further away from the rim — using sticks and wooden blocks to pry the tire open, then applying long-jaw vise clamps for additional compression. The key process point of this phase: expose the sensor only; the tire does not need to come off the rim entirely. This is what makes “TPMS sensor replacement without tire removal” possible.
Phase 3 · Remove Old Sensor & Stem
A ratcheting wrench with a Torx bit loosens the screw holding the TPMS sensor in place. One move worth drilling: attach a strong magnet to the tip of the Torx bit. When only a few threads remain, switch to finger-tightening — the magnet holds the screw steady and prevents it from dropping into the tire cavity. A loose screw inside a tire cavity is a real headache. Once the old sensor is removed, the valve stem grommet is cut and the old rubber valve stem is pulled out. Cut pieces must not be allowed to fall into the tire either.
Phase 4 · Clean the Seats and Install the New Stem
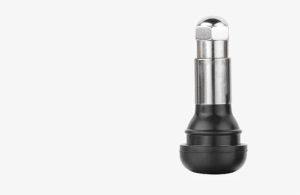
Before installation, the inner seat of the valve hole is cleaned with a Scotch-Brite pad; the outer seat is cleaned by wrapping the pad around a socket and working it across the surface. Loose fibers and dust are then blown off with compressed air. Liquid dishwashing soap is applied to the section of the new valve stem that will pass through the hole — it acts as both a lubricant and a bead-sealing aid during inflation. Stem selection depends on the application: metal TPMS valves suit high-temperature service, while rubber TPMS valves cover most standard replacements. Once inserted, the valve stem tool pulls it firmly into place.
Phase 5 · Install the New TPMS Sensor
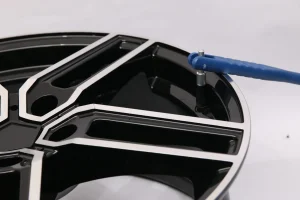
The new TPMS sensor is aligned with the valve stem position. The Torx screw is finger-tightened first, then finished to spec with a ratcheting wrench per the vehicle manual. A two-second move of outsized importance: rotate the TPMS sensor to confirm it does not contact the inner rim wall — otherwise vibration during driving will progressively wear the sensor down.
Phase 6 · Reassembly and Inflation
The clamps and blocks are removed. The rim bead seat is cleaned again with a Scotch-Brite pad and blown clear with compressed air. A layer of dishwashing soap is applied to the tire bead to help it seat properly during inflation. The tire is inflated to the vehicle’s specified pressure (see the B-pillar label) and the valve cap is reinstalled.
TPMS Bay Time vs Traditional Method
Adding the six phases together, a single TPMS sensor job lands at 11–17 minutes. Compared with the traditional “remove tire + replace TPMS sensor + remount tire” path of 30–45 minutes, the beat is optimized by roughly 50%–65%.
TPMS Tire Sensor Installation Tips: Five Bay Movements
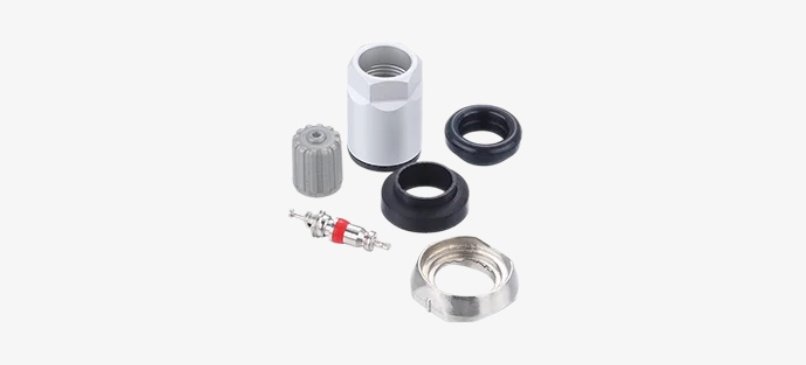
Process steps can be broken down, but the know-how has to be memorized separately. The five movements below are worth carving into muscle memory.
The magnet anti-drop trick. Attach a magnet to the Torx bit tip to keep small metal parts out of the tire cavity — the simplest and most effective habit.
The dual role of dish soap. It lubricates the valve stem pull-through and assists bead sealing during inflation.
Scotch-Brite instead of sandpaper. Gentler on aluminum seats and leaves no scratches on the sealing surface.
The no-bead-drop mindset. It converts TPMS sensor work from a heavy-asset, tire-machine-dependent job into a lightweight operation any standard bay can perform.
Rotate the TPMS sensor after install. A two-second check that eliminates vibration-wear complaints later.
TPMS Sensor Replacement: Tools and Workspace Standards
Tool Tiers
Essential tools: a 1/4″ drive ratcheting wrench, a Torx bit, a strong magnet, a valve stem tool, a Scotch-Brite pad, liquid dish soap, and a blow gun.
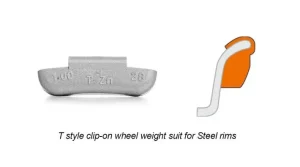
Optional tools: a jack paired with a trailer hitch, serving as a substitute when no tire machine is available. For shops that also mount tires, keeping wheel weights on hand keeps the bay self-contained.
Upgrade configuration: a dedicated TPMS bay cart, an adjustable torque wrench, and an OBD pairing tool.
Workspace Requirements
The bay floor must be hard and level to ensure safe jack operation. The compressed air supply must be stable and the blow gun output clean. Operators should wear eye protection against dust and debris.
Parts Storage
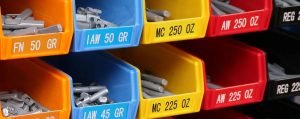
Sorting stock by vehicle model, frequency (315 MHz / 433 MHz), and valve stem type is a hidden optimization that reduces wasted motion at the bay.
TPMS Service Safety: The Non-Negotiable QC Checklist
The QC core for a TPMS swap bay has four pillars:
Jack operation safety. Base position and load rating must be confirmed before every job.
Zero tolerance for tire cavity debris. Screws, washers, and valve stem fragments — any metal piece left inside the tire becomes a future problem.
Inflation pressure limits. Watch the bead seating during inflation and avoid over-pressure bursts.
TPMS sensor clearance recheck. After installation, rotate the sensor to confirm it does not contact the rim’s inner wall.
The supporting bay QC sheet should record: final tire pressure, screw torque, TPMS pairing status, road-test confirmation, and the customer handover note (recheck date, pairing method, warranty coverage).
FAQ
Q1: Will the no-bead-drop TPMS method damage the rim?
No. All force is applied at the bead inside the tire cavity, with no additional shear load on the rim edge. The contact zone should still avoid the thin web sections of an aluminum rim.
Q2: Does this method fit all vehicle models?
It fits the vast majority of passenger vehicles and light commercial vehicles on either steel or aluminum rims. Ultra-low-profile tires (below 40-series sidewall height) require a more careful clearance assessment.
Q3: Will a new TPMS sensor work without pairing?
It will collect tire pressure data normally, but the dashboard will not display it — OBD pairing must be completed for the warning light to clear.
Q4: How much time does a single TPMS job actually save?
Skilled technicians clock in at under fifteen minutes, saving fifteen to twenty-five minutes versus the traditional method.
Q5: How should a shop pick between OE-equivalent, branded, and programmable TPMS parts?
OE-equivalents offer the most stable fit for high-end vehicles. Branded aftermarket and programmable universal parts deliver better cost efficiency for volume models and fleet work. The shop’s real task is building a clear inventory tiering strategy.