Lug nuts with incorrect torque can cause a wheel to come loose at highway speed — one of the most dangerous failures a driver can experience. Too loose, and the wheel works free over the first 100 km; too tight, and the studs stretch or snap under load. The fix is a five-step procedure that takes less than 15 minutes per wheel: install, hand-tighten in the right pattern, walk on with a breaker bar, torque to spec with a calibrated wrench, then re-torque after the wheel settles. Here is the full procedure, the three tools you need, and the three questions that come up most often at the final-torque step.
Why Lug Nut Torque Matters
The Risks of Improper Lug Nut Torque
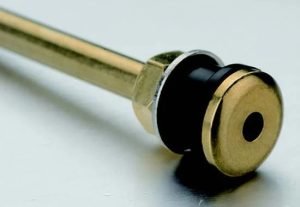
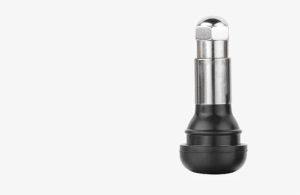
Lug nut torque errors produce two failure modes, both dangerous. The same principle applies to tire valves: incorrect installation leads to slow leaks and potential failure. Under-torque — the wheel is not clamped fully against the hub face. Over the first 50–200 km of driving, micro-movement between the wheel and hub face wears the lug holes into ovals, the wheel begins to wobble, and the studs work loose. By the time the driver notices a vibration, one or more studs have typically already yielded. Over-torque — the stud stretches past its elastic limit. The first heavy brake application snaps the inner front stud, often without warning. Both modes share a property: they are 100% preventable with a calibrated torque wrench and the correct spec.
When to Re-Torque After a Wheel Swap
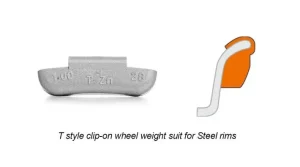
The first 50–100 km of driving settles the wheel fully against the hub face. This settling reduces the clamp load by 5–10% on average — enough that the wheel is no longer at its specified torque even though the wrench reading was correct at install. A re-torque pass after 50–100 km restores the original clamp load. Beyond that initial re-torque, lug nuts do not require periodic re-torque under normal use — only after brake service, tire rotation, or wheel removal for any other reason. Other wheel components, such as wheel weights, also require correct specification and installation to maintain balance.
Tools and Torque Spec Lookup
The Calibrated Torque Wrench
A torque wrench is the only tool that applies a known, repeatable axial force to a lug nut. Three types are common: click-type (most popular; emits a tactile and audible “click” at the set value), beam-type (less common; uses a deflecting needle and visual reading), and digital (most accurate; displays the actual torque reading). For passenger car work, a click-type wrench in the 1/2″ drive, 80–150 ft-lb range covers nearly every fitment. Calibration matters: a torque wrench should be checked against a known load every 12 months or 1,000 cycles, whichever comes first.
Finding Your Vehicle’s Lug Nut Torque Spec
Torque spec is set by the wheel manufacturer, not the lug nut manufacturer, and varies by wheel type and stud size. Three reliable sources: the vehicle owner’s manual (under “Wheels and Tires” or “Specifications”), the wheel manufacturer’s spec sheet (often printed on the wheel box or available online), and the lug nut packaging for OE replacement wheels. Typical passenger car ranges: 80–100 ft-lbs for compact and mid-size cars; 90–110 ft-lbs for SUVs and light trucks; 100–120 ft-lbs for performance and heavy-duty applications. A common mistake is to use the lug nut’s maximum rated torque instead of the wheel’s specified torque.
The Breaker Bar for the Walk-On Pass
A breaker bar is a long-handled, non-ratcheting tool used to apply high torque without the precision of a torque wrench. In the lug nut installation sequence, the breaker bar does the “walk-on” pass — bringing the lug nuts from hand-snug to firm-snug before the torque wrench takes over for the final precise pass. A 1/2″ drive breaker bar in the 18–24″ length range provides enough leverage to bring all four or five lug nuts to firm-snug without over-torquing any of them.
Lug Nut Installation — Star and Cross Patterns
Pattern Rules — 4-Lug Cross, 5+ Star
The pattern used during installation determines how evenly the wheel clamps to the hub. Two patterns cover the entire range of consumer vehicles. Cross pattern — for 4-lug wheels, tighten opposite nuts in alternation (top-left, then bottom-right, then top-right, then bottom-left). Star pattern — for 5-lug and 6+ lug wheels, tighten every other nut around the wheel in alternation, ending with a full circle at final torque. The cross pattern is a special case of the star pattern optimized for 4 evenly-spaced nuts; using a circular pattern (top-left, top-right, bottom-right, bottom-left) pulls the wheel against the first nut and mis-centers it on the hub.
Hand-Tightening First
Every lug nut must be turned by hand for the first 2–3 rotations before any power or bar tool is used. The hand pass accomplishes three things: it confirms the nut is the correct thread size and pitch (cross-threading feels like resistance within the first turn), it seats the nut squarely against the wheel’s lug hole, and it prevents the wheel from shifting on the studs as the wrench engages. Skipping the hand pass is the single most common cause of cross-threaded studs during a wheel swap.
The Walk-On Pass With a Breaker Bar
Once all lug nuts are hand-tight, the wheel goes back on the ground. Gravity pulls the inner wheel face flush against the hub face, which removes any gap that was present when the wheel was suspended on the lift. With the wheel loaded, take the breaker bar and apply firm torque to each lug nut in the same star or cross pattern used for hand-tightening. The walk-on pass brings each nut to “pretty snug” — typically 40–60% of the final torque — without over-torquing. The torque wrench handles only the final precise pass.
The Final Torque Pass
Listen for the Click — The Pop Signal
A click-type torque wrench emits a sharp click and a slight rotational give the instant the set torque value is reached. The click is both audible (a clear mechanical snap) and tactile (the wrench suddenly feels “loose” in the direction of tightening). Stop turning the instant the click happens — applying more force after the click drives the nut past spec and risks stud stretch. Beam-type and digital wrenches use a different signal (needle on the scale, beep on the display) but the principle is identical: stop at the indicated value, not beyond it.
Two-Pass Torquing for Even Clamp Load
A single pass at full spec produces uneven clamp load — the first nut torqued reaches its final value while the opposite nut is still below spec. The fix is two passes: first pass at 50–70% of final torque (e.g., 50 ft-lbs on a 100 ft-lb spec), second pass at full torque. Both passes use the star or cross pattern. For larger wheels or higher torque specs, a three-pass sequence (50% / 75% / 100%) is recommended. The pattern does the work; the multiple applications let the wheel center itself incrementally rather than being pulled hard against the first nut.
Re-Torque After 50–100 km
Within the first 50–100 km after install, the wheel face settles against the hub face under real loads — cornering, braking, expansion under heat. This settling reduces clamp load by 5–10% on average. The driver should re-torque after this distance: same star pattern, same final torque value, same torque wrench. Beyond the first re-torque, lug nuts do not require periodic re-torque under normal use. Skipping the re-torque pass is a common cause of vibration complaints that appear 200–500 km after a tire swap.
FAQ
What Happens If I Over-Torque Lug Nuts?
Over-torquing stretches the stud past its elastic limit and may crack the wheel’s lug seat. Three failure modes are common. Stud stretch — the stud lengthens by 0.1–0.3 mm under each over-torque event, and after 3–5 events the stud snaps under braking load. Wheel lug seat deformation — the conical seat is compressed past spec, and the wheel no longer centers correctly on the hub. Brake rotor warp — chronic over-torque on front wheels can warp the rotor face within 5,000–10,000 km, showing up as brake pedal pulsation. Recovery from each of these requires stud replacement, wheel replacement, or rotor machining — all more expensive than re-torquing correctly the first time. For shop operators, Fortune autoparts supplies replacement lug nuts and studs in batch quantities with consistent QC across every case.
Can I Use an Impact Gun for the Final Pass?
No. An impact gun applies torque in sudden bursts and cannot be calibrated to a precise final value. Using an impact gun for the final pass typically produces over-torque by 20–40% above spec, even when the operator is “being careful.” The impact gun is appropriate for the walk-on pass on a passenger car (with a torque stick limiting output to roughly 80% of spec), but the final precise pass must always be a calibrated, manually-operated torque wrench. The 30 seconds saved by skipping the torque wrench is not worth the stud replacement on the next brake job.
Why Does My Torque Wrench Click But the Lug Nut Still Spins?
This is the classic symptom of a stripped or partially-stripped thread. The wrench reaches the set torque because the nut is being driven against the wheel face by friction alone, not because the stud is carrying the clamp force. Three scenarios produce this. Stripped wheel stud — the stud is damaged and cannot hold torque; replace the stud before continuing. Cross-threaded lug nut — the nut is partially engaged and is being driven against the rim by friction; back off, inspect the threads, and hand-thread again. Wrong thread size — an M12×1.5 nut on an M12×1.25 stud reaches the click without proper engagement; verify the thread size against the wheel spec sheet before continuing. In all three cases, the correct response is to stop, diagnose, and re-engage — not to add more torque.