
admin1
May 18, 2025
Top Tips for Applying Wheel Weight Tape Effectively

Getting your tires balanced isn’t just about comfort—it’s about safety and performance, too. Properly applying wheel weight tape plays a crucial role in making sure your tires stay balanced. Modern balancers can measure imbalances as small as 0.25 ounce, yet even tiny missteps during application can leave residual imbalances. For example, advanced machines like the Coats 1250 Series can reduce static imbalance to below 0.20 ounce, ensuring smoother rides and better handling. By focusing on preparation, precision, and maintenance, you can make your tape application last longer and keep your vehicle running at its best.
Preparing for Wheel Weight Installation
Cleaning the Wheel Surface for Optimal Adhesion
Before you start applying wheel weight tape, make sure the wheel surface is spotless. A clean surface ensures the tape sticks properly and stays in place for a long time. Dirt, grease, or wax can weaken the adhesive and cause the tape to peel off prematurely.
Here are some cleaning techniques you can use to prepare the wheel surface:
| Cleaning Method | Description |
|---|---|
| Degreasing | Use a mild detergent or automotive cleaner to remove wax, oil, and residue that might interfere with adhesion. |
| Alcohol or Isopropyl Wipes | Wipe the surface with alcohol wipes to eliminate contaminants and ensure it’s clean and dry. |
| Clay Bar Treatment | For stubborn grime like tree sap, use a clay bar to lift embedded particles without damaging the paint. |
| Sandpaper or Abrasive Pads | Smooth out rough spots or adhesive remnants with fine-grit sandpaper, but be careful not to scratch the paint. |
| Final Rinse | Rinse thoroughly with clean water to remove any leftover cleaning products. |
Each method has its strengths, so choose the one that fits your situation best. For example, alcohol wipes are quick and effective for everyday cleaning, while a clay bar works wonders on tougher contaminants. Once the surface is clean, let it dry completely before moving on to the next step.
Selecting the Right Wheel Weight Tape for Your Tire
Not all wheel weight tapes are created equal. Picking the right tape for your tire is crucial for achieving proper balance and durability. Start by considering the type of tire you’re working with. Is it for a passenger car, a truck, or a performance vehicle? Each type may require a different tape thickness or adhesive strength.
Look for tapes specifically designed for automotive use. These tapes are engineered to withstand the heat, moisture, and vibrations that tires encounter daily. If you’re unsure, consult the manufacturer’s recommendations or ask a professional for advice.
Also, pay attention to the tape’s weight distribution. Some tapes come pre-cut into segments, while others are continuous rolls that you can customize. Pre-cut segments are convenient, but rolls give you more flexibility for unique balancing needs.
Ensuring Proper Temperature and Dryness Before Application
Temperature and moisture can make or break your wheel weight tape application. Adhesives work best in moderate temperatures, typically between 60°F and 80°F. If it’s too cold, the adhesive may not bond well. If it’s too hot, it could become overly soft and lose its grip.
Before applying the tape, check the weather conditions or the temperature in your workspace. If it’s chilly, warm up the wheel surface slightly using a heat gun or hair dryer. Just don’t overdo it—extreme heat can damage the adhesive.
Dryness is equally important. Even a small amount of moisture can weaken the bond between the tape and the wheel. After cleaning the surface, double-check that it’s completely dry. If you’re working in a humid environment, consider using a fan or dehumidifier to speed up the drying process.
By following these tips, you’ll set yourself up for a successful installation that lasts.
Step-by-Step Guide to Applying Wheel Weight Tape

Measuring and Cutting the Tape Accurately
Getting the right length of wheel weight tape is the first step to a successful application. You’ll want to measure carefully to ensure the tape fits snugly on the wheel assembly. Start by identifying the area on the wheel where the tape will go. Use a measuring tape or ruler to determine the exact length needed.
Once you’ve measured, cut the tape with precision. A sharp pair of scissors or a utility knife works best for this. Avoid jagged edges—they can compromise the tape’s adhesion and make it harder to balance the tire properly. If you’re using pre-cut segments, double-check that the size matches your measurements.
Here’s a quick tip: Always cut a little extra if you’re unsure. It’s easier to trim excess tape than to deal with a piece that’s too short. By taking your time with this step, you’ll set yourself up for a smoother application process.
Aligning the Tape for Precise Tire Balancing
Alignment is everything when it comes to tire balancing. After cutting the tape, position it carefully on the wheel assembly. The goal is to place the tape exactly where the imbalance occurs. If you’re using a balancing machine, it will indicate the correct spot for the tape.
To align the tape, peel off the backing and hold it close to the wheel surface. Don’t rush—take a moment to ensure the tape is straight and centered. Misaligned tape can throw off the balance and affect your tire’s performance.
If you’re working with a curved wheel surface, gently bend the tape to match the contour. This ensures full contact between the adhesive and the wheel. Proper techniques like this help you achieve accurate wheel balancing and improve your vehicle’s handling.
Applying Firm and Even Pressure for Strong Adhesion
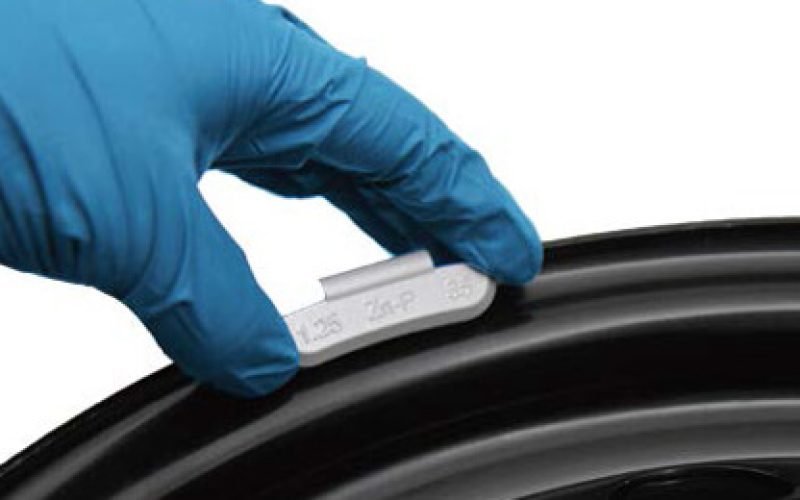
Once the tape is aligned, it’s time to secure it. Press down firmly on the tape to activate the adhesive. Use your fingers or a small roller to apply even pressure across the entire length of the tape. This step is crucial for ensuring the tape stays in place, even under the stress of daily driving.
If you notice any air bubbles or gaps, smooth them out immediately. These can weaken the bond and reduce the effectiveness of the tape. For best results, apply pressure for at least 10-15 seconds. This gives the adhesive enough time to bond with the wheel surface.
Here’s a pro tip: If you’re working in colder temperatures, warm up the tape slightly before pressing it down. A heat gun or hair dryer can help soften the adhesive, making it easier to secure. Just be careful not to overheat the tape—it should feel warm, not hot.
By following these steps, you’ll ensure your wheel weight tape is applied correctly, leading to better tire balancing and smoother rides.
Avoiding Common Mistakes During Wheel Weight Installation

Skipping Surface Preparation Steps
Skipping surface preparation is one of the most common mistakes you can make when installing wheel weight tape. Adhesive tape needs a clean, smooth surface to stick properly. If you skip cleaning, dirt, grease, or wax can interfere with the bond, causing the tape to peel off or shift over time.
Here’s how you can avoid this mistake:
- Always clean the wheel surface first. Use alcohol wipes or a degreaser to remove contaminants.
- Inspect for stubborn grime. If you notice tree sap or adhesive residue, use a clay bar or fine sandpaper to smooth it out.
- Dry the surface completely. Even a tiny bit of moisture can weaken the adhesive.
Tip: Think of surface preparation as the foundation for your installation. A few extra minutes spent cleaning can save you hours of frustration later.
Using Inappropriate Tape for Specific Wheel Types
Not all wheel weight tapes are suitable for every type of wheel. Using the wrong tape can lead to poor adhesion, uneven weight distribution, or even damage to your wheels.
To avoid this mistake:
- Match the tape to your wheel type. Passenger cars, trucks, and performance vehicles often require different tape specifications.
- Check the adhesive strength. Some tapes are designed for high-performance wheels and can handle extreme conditions, while others are better suited for everyday use.
- Consult the manufacturer’s guidelines. If you’re unsure, look for recommendations specific to your vehicle or ask a professional.
Note: Using premium-quality tape ensures durability and better performance. Cheap or generic tapes may not hold up under heat, moisture, or vibration.
Applying Tape in Suboptimal Environmental Conditions
Environmental factors like temperature and humidity can significantly impact the success of your installation. If the conditions aren’t right, the adhesive may fail to bond properly, leading to tape failure.
Here’s how to avoid this mistake:
- Check the temperature. Adhesives work best between 60°F and 80°F. If it’s too cold, warm the wheel surface slightly with a heat gun or hair dryer.
- Avoid high humidity. Moisture in the air can weaken the adhesive. Use a fan or dehumidifier if you’re working in a damp environment.
- Work indoors when possible. Controlled environments reduce the risk of temperature or moisture-related issues.
Pro Tip: If you’re working outdoors, plan your installation for a dry, mild day. Extreme weather conditions can make the process much harder.
By steering clear of these common mistakes, you’ll ensure your wheel weight tape stays secure and performs as intended.
Troubleshooting and Maintenance for Wheel Weight Tape
Addressing Adhesion Issues with the Tape
If your wheel weight tape isn’t sticking properly, don’t worry—it’s a common issue with a few simple fixes. Adhesion problems often come down to surface preparation or environmental factors. Start by checking the wheel assembly for any leftover dirt, grease, or old adhesive. Even a small amount can weaken the bond. Use an alcohol-based spray or wipe to clean the surface thoroughly. This breaks down old adhesive and ensures a clean slate for the new tape.
When removing old wheel weights, use a specialized scraper. It makes the job easier and prevents scratches on the wheel assembly. Avoid silicone sprays or penetrating oils during cleaning. These can leave a residue that reduces the adhesive strength of the new tape.
For long-lasting results, choose adhesive products designed to handle extreme temperatures. High-performance wheels, for example, generate more heat, so you’ll need a tape that can withstand those conditions. By following these steps, you’ll keep your tape secure and your tire assembly balanced.
Ensuring Even Weight Distribution for Tire Balancing
Uneven weight distribution can lead to annoying vibrations and poor handling. To avoid this, always double-check the placement of your wheel weights during mounting. Use a balancing machine to pinpoint the exact spots where the tape is needed. This ensures the weight is distributed evenly across the tire assembly.
If you’re working with high-performance wheels, pay extra attention to precision. These wheels are more sensitive to imbalances, so even a slight misplacement can cause noticeable vibration. After mounting the tape, spin the tire assembly on the balancing machine again to confirm everything is aligned.
Remember, even small adjustments can make a big difference. Taking the time to ensure even weight distribution will improve your ride quality and reduce wear on your tires.
Replacing Damaged or Worn Wheel Weight Tape
Over time, wheel weight tape can wear out or get damaged. If you notice peeling, cracks, or reduced adhesion, it’s time for a replacement. Start by removing the old tape carefully. Use a scraper to lift it off without damaging the wheel assembly.
Once the old tape is gone, clean the area thoroughly. Any leftover residue can interfere with the new tape’s adhesion. After cleaning, let the surface dry completely before applying the replacement tape.
When mounting the new tape, follow the same steps you used during the initial installation. Measure accurately, align the tape properly, and press it down firmly. This ensures the new tape stays in place and keeps your tire assembly balanced. Regular maintenance like this helps prevent unnecessary vibration and extends the life of your tires.
Proper wheel weight installation isn’t just about sticking tape on a wheel—it’s about ensuring your vehicle performs at its best. By cleaning the surface, choosing the right tape, and applying it with care, you’ll achieve a smoother ride and better handling. Don’t forget regular maintenance to keep everything balanced and secure. These small steps can make a big difference in your driving experience. So, take your time, follow these tips, and enjoy the benefits of a well-balanced tire assembly!
FAQ
What is the purpose of wheel weight tape?
Wheel weight tape helps balance your tire and wheel assembly. It ensures even weight distribution, reducing vibrations and improving handling. Properly applied tape enhances your vehicle’s performance and extends tire life.
Can I reuse wheel weight tape?
No, you shouldn’t reuse it. Once removed, the adhesive loses its strength. Always replace old tape with new to maintain proper balance and adhesion.
How do I know if my wheel weight tape is failing?
Look for signs like peeling, cracks, or shifting. If your vehicle vibrates or handles poorly, the tape might not be holding. Inspect the assembly and replace the tape if needed.
Do I need special tools to apply wheel weight tape?
Not necessarily. A measuring tape, scissors, and a clean cloth are usually enough. For better results, use a balancer to pinpoint where to place the tape on the wheel.
How often should I check my wheel weight tape?
Check it during routine tire maintenance or if you notice vibrations. Regular inspections help catch issues early, ensuring your tire and wheel assembly stays balanced.
